April, 2015
So April is here and nearly gone, and there's a lot going on.
Today is Patriots' Day; a civic holiday in Massachusetts celebrating what was the start of the Revolutionary War on April 19, 1775 and the anniversary of the battles at Lexington and Concord.
However, this is not a Federal holiday, and because we don't get the day off, many people overlook this famous date.
Two hundred and forty years ago citizen soldiers from 13 colonies fought against the oppressive Kingdom of Great Britain and formed what would become the most powerful nation in the world.
A nation founded on certain inalienable rights which were endowed by our Creator.
We hold these truths to be self-evident, that all men are created equal, that they are endowed by their Creator with certain unalienable Rights, that among these are Life, Liberty and the pursuit of Happiness. --That to secure these rights, Governments are instituted among Men, deriving their just powers from the consent of the governed, --That whenever any Form of Government becomes destructive of these ends, it is the Right of the People to alter or to abolish it, and to institute new Government, laying its foundation on such principles and organizing its powers in such form, as to them shall seem most likely to effect their Safety and Happiness.
Perhaps today more so than at any other time in our history is a good day to be reminded of our history and the principles on which this country was founded, starting with the Battles of Lexington and Concord, the Declaration of Independence, Constitution of the United States, and the Bill of Rights.
Here are a few other things going on this month:
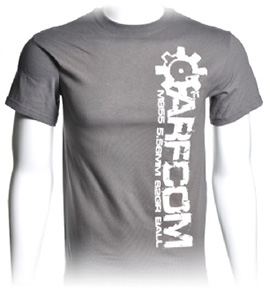
t-shirts are back in the store
-
T-Shirts
Finally, t-shirts are back online!
It's been almost 2 years since we moved and had to discontinue what was probably our most popular product, but now they're back, better than ever.
-
Giveaways
TNVC has been graciously giving away prizes this Spring.
This month we announce the winner of last month's ATPIAL-C laser, as well as announce perhaps the largest single item giveaway we've ever done.
Check out the right column for the Ultra Hog Crusher package valued at over $8000!
All you need to do is click the link provided, and you will be entered.
Only one entry per email address is counted, so each entry has to have a subscription via their own email.
I know that this is not the last giveaway either, so make sure you enter, and tell your friends who are not already subscribed to the newsletter, as this is the only way to enter and win.
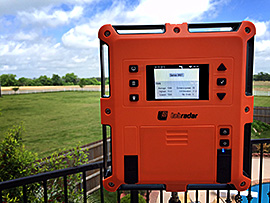
LabRadar tested with a subsonic .22LR round at 80yds
-
LabRadar
This month we bring you a first look at a tool that I believe will change the way we chrono our ammo forever.
The LabRadar, a personal doppler radar, that we've mentioned in the past and discussed from SHOT Show, has finally shipped product!
These first few units have gone out and we were lucky to get one in hand for a first look, below. We will continue to update this as we get more time with the unit.
-
New Newsletter Layout - next month we'll be rolling out an updated look for the newsletter to make it compatible with more mail clients as well as to reflect changes coming with the update of the main site.
-
NRA Annual Meeting - this month was the NRA Annual Meeting in Nashville, TN and though we were not able to attend this year, 70,000 of you did.
Check out the site for a video from the leadership forum and elsewhere on the site are threads with images and discussions.
Next year's meeting is in Louisville, KY, May 20-22, 2016, then Atlanta in 2017, and Dallas in 2018.
-
Hollis v. Holder
Coming up in a few days is our very own NoloContendere's NFA case: #35 Order Setting Hearing.
Oral argument on Defendants’ Motion to Dismiss, or in the Alternative, for Summary Judgment, filed January 16, 2015, is SET for Thursday, April 23, 2015, at 1:30 p.m. at the Federal Building in Dallas.
These arguments are generally open to the public. From those not there, know that the rest of us are behind you Nolo!
For those of you that have no idea what's going on, you've got some reading to do: NFA cases: Hollis v. Holder; Watson v. Holder.
-
Canton Trade Days
The next Canton Trade Days is (April 30-May 3, 2015)
Check out the Trade Days thread and we hope to see you there.
|

|
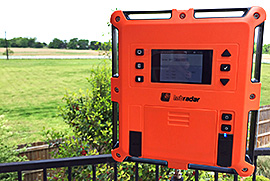
LabRadar set up for testing, right out of the box
This month we take a look at a product that I've been waiting a long time to get my hands on.
This personal doppler radar is able to replace a chrono for all your projectile velocity measuring needs (archery, firearms, airguns), and is easier to use, safer as you don't shoot through it, and works under all conditions.
This first article will give an overview of its operation, features, and results, but is by no means an in-depth evaluation of the product as we have simply not had much time with it.
Unit is serial number #48, and has versions 1.0 of all firmware.
Overview
LabRadar uses doppler radar technology to obtain the velocity of projectiles. It contains a transmitter and receiver to gather the data.
It can be triggered by the sounds of your shot, or by detecting the object moving downrange. This second mode is for airguns and bows that have no report, and in fact was necessary to trigger the unit when tested with our suppressed .22LR rifle.
Since doppler radar signals travel at the speed of light, it is very accurate under virtually all conditions.
The unit is positioned along side the shooter, to the side of the muzzle or bow, and aimed downrange with the display facing the user.
Upon firing the shot, the unit will continually track the projectile and report numerous velocities along its path. The data is immediately shown on the LCD display, and is also stored. While it shows up to 5 velocities per shot at various ranges on the display, it gathers and stores more (discussed later with example data provided).
The box contains LabRadar, Micro USB cable, User Guide, and Warranty Card (1yr). There are a number of accessories available for it such as various stands, a custom carry bag, and an external trigger. We're testing the base unit, as it comes.
Additionally, there are indicators in photos for bluetooth and other features that may be reserved for future use, or at least well ahead of the basic functions that I've had a chance to play with.
Specifications
| DESCRIPTION |
SPECIFICATION |
| Power Requirement: |
6 AA Batteries or USB Powered, 800mA |
| Frequency Range: |
24.080 to 24.168GHz 8MHz channel steps |
| Nominal Transmitting Power: |
4.84 dBm |
| Antenna Gain: |
22dBi |
| Transmitter Stability: |
+/-2 ppm |
| Beamwidth: |
7.6 degrees x 18.5 degrees (transmit) |
| Dimensions: |
29cm x 26cm x 6cm (2.1lbs) |
| Mounting Hole Thread: |
1/4"x20 |
| Velocity Range: |
65-3900 fps |
| Memory Type/Capacity: |
SD, SDHC Card 32Gb max |
| Minimum Time Between Shots: |
2 seconds |
| Accuracy: |
+/-0.1% (+/-1m/s @ 1000m/s) |
| Operating Temperature: |
-10C to 40C (14F-104F) |
| Environmental Conditions: |
Outdoor |
Operation
| LED STATUS |
DESCRIPTION |
| Off |
Unit is Off |
| Blue |
Unit is On, not transmitting |
| Orange |
Unit is On, transmitting (armed) |
| Flashing Orange |
Unit is On, transmitting (will stop transmitting shortly if no trigger) |
Button Definition
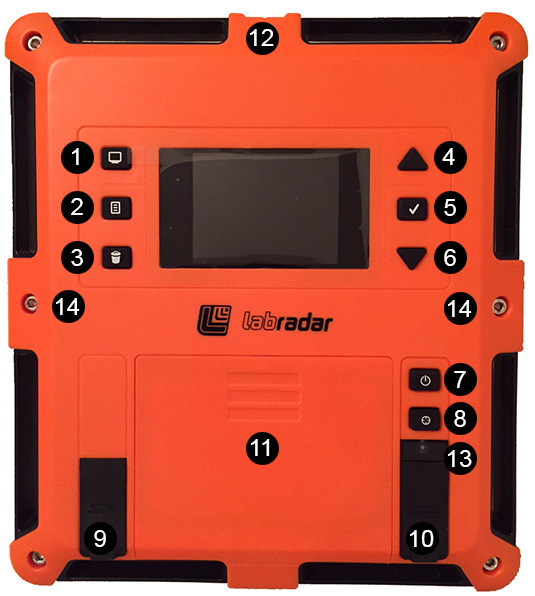
| 1. Display / Parameters |
8. Arm |
| 2. Series |
9. SD Card |
| 3. Delete |
10. USB Connector / External Trigger |
| 4. Up |
11. Battery Compartment |
| 5. Enter |
12. Sighting Notch |
| 6. Down |
13. LED Indicator |
| 7. Power |
14. Internal Acoustic Trigger Sensors (2x) |
Configuration Menu Definitions
When the Display/Parameters button is pressed, the following menu options are available:
| MENU SELECTION |
DESCRIPTION |
| Velocity Units |
Change the units used when displaying velocity measurements. The user can choose from the following units:
- Feet Per Second (fps)
- Yards Per Second (yps)
- Miles Per Hour (mph)
- Meters Per Second (m/s)
- Kilometers Per Hour (Km/h)
|
| Distance Units |
Change the units used when displaying distance measurements. The user can choose from the following units:
- Feet (ft)
- Yards (yd)
- Meters (m)
|
| Weight Units |
Change the units used to enter the weight of the projectile. The user can choose from the following units:
|
| Select Vel Range |
Select the velocity range for measurements by the LabRadar. Each velocity range is specified to weapons types as a reference:
- Rifle (984 fps and up)
- Handgun (246 fps to 1722 fps)
- Archery (66 fps to 738 fps)
|
| Set Proj Offset |
Input the maximum distance between the muzzle and the side of the radar to optimize the precision of the measurements. A shorter distance will provide more precise measurements. |
| Set Distances |
Specify the distances at which the velocity measurements are made: Dx1 to Dx5. The values can be selected in increments of one. After you select your first distance, press enter and the second distance can be selected. Repeat and select up to 5 different distances.
Note: the Power Factor is calculated using the velocity at Dx1. Set Dx1 according to the distance at which you want the PF to be calculated.
|
| Proj Weight |
Set the projectile's weight of the next shot. This value is used in some calculations (power factor, kinetic energy) and written on the file on the SD Card for future reference. |
| Arm Time |
Change the amount of time the radar stays in transmission before it stops transmitting. This count is reset each time a trigger is received. You can select between 10-600 seconds in increments of 10 seconds. During the last 10 seconds, the LED will begin to flash warning you the armed time is about to expire. If the LED turns blue and you wish to continue, press the arm button one time and it will return to the armed mode (orange). The longer the armed time, the faster the batteries will be depleted. |
| Screensaver |
Select the idle time before the screen is turned off. This is an energy saving feature. The device will continue to operate while the screen is off. Pressing a button or triggering the unit will wake up the screen. |
| Trigger Source |
Select the source of the event triggering the measurement. The user can select from the following:
- Trigger : use the internal microphones built in the product's enclosure or an external trigger device
- Doppler : use the signal returned from the projectile to trigger the unit. This mode should be considered with large projectiles traveling at really slow speeds only. Do not use this mode for firearms, it will affect the precision of the measurements.
|
| Trigger Level |
Select the sensitivity of the system to detect the trigger event. The user can select level 1 (more sensitive) through level 5 (least sensitive). This setting affects:
- The internal acoustic trigger level
- The external trigger level
- The doppler trigger level
|
| TX Channel |
Select the frequency of transmission of the radar. In order to use multiple radars close to each other, use a different frequency for each. |
| TX Power |
Select the LabRadar transmitting power (standard or low). While standard power offers longer range, the low power mode can be useful and perform better on shorter ranges and on ranges where objects create reflections. |
| System Date |
Set the system date |
| System Time |
Set the system time |
| About |
View the radar's information (serial number, firmware versions) |
Using the LabRadar
Turn on the LabRadar by pressing the power button (7). You will see a blue light (13) to indicate the unit is on. The series information will appear.
If you want to create a new series, press the series button (2) and confirm that you want to start a new series by pressing the enter button. If you want to continue recording shots in the existing series, skip the new series creation and continue to the next step.
To start recording shots, press the arm button (8) twice and the light will change from blue to orange. The radar is now armed and you are ready to shoot.
When you are finished shooting, you can press and hold the arm button (8) to return to the series information. The light will change from orange to blue. You can also wait for the arm time that you set to expire.
Aligning the Radar
To properly align the radar, look through the sighting notch at the top of the unit and aim the radar at your target.
The LabRadar should not be in front of your muzzle. It is acceptable to place your muzzle in front of the LabRadar. Ideally it should be in a position where you can see the screen from your shooting position.
Display Details

Individual Shot Review
Individual Shot Review - In this view, you can look at the individual shot and it's results. As you can see in the image at the right, Shot 0001 of Series 0001 shows velocities in fps for the preset ranges of 0, 10, 25, and 50 yds (75 and 100 showed no results).
The range at which the LabRadar can detect a bullet varies with the size of the bullet. For a .22, it says 40-60yds is about the the maximum. This goes up to 80-100yds for a 30 caliber bullet, and 100-130yds for a 9mm.
As you can see in my results it lost it after 50yds which is exactly as expected. While the range is certainly a limitation, it is much more information than a traditional chronograph could provide.
Range is affected by projectile's diameter, tail design, shape, position in the air, and sub projectiles (sabots, wads, etc.).

Series Stats
Series Stats - In this view, you can see the series statistics.
These include:
- average velocity
- highest velocity
- lowest velocity
- extreme spread (lowest subtracted from highest)
- standard deviation (how spread out are the values, lower means most are very close to average)
- number of shots in the series
Data Results
So as we've mentioned above, we did our initial testing using a .22LR suppressed rifle. Figured this would be the toughest challenge for the unit, so why not jump in.

Suppressed CZ 455 in .22LR used in testing
Ammunition used was Remington Target Standard Velocity .22 Long Rifle Round Nose 40gr bullet with a published speed of 1150fps. I have found these to be subsonic out of this rifle most of the time, and accurate.
Initial attempts to trigger with sound failed, even at the most sensitive level, so I had to resort to using the doppler trigger mode. This worked reliably, and I believe the data is good though it would require a traditional chrono to verify.
The data shown above in the screenshots represents a 5 shot series. As shown, we had velocities at various ranges, and the LabRadar picked up the tiny bullet at 50 yds which is impressive considering the size.
However, it records much more detail than what it shows in the display. This is saved to the SD card, and is available for download and further evaluation.
I have published a zip file of the folder written for this series here for those of you that want to dig in and see what it provides.
Briefly looking at the data, it saves it by series, so there is a folder for SR0001. Within that folder is a SR0001 Report.csv file, which has summary info for the series. It looks like this:
sep=;
Device ID;LBR-0000048;;�
�
�Series No;0001;;
�
�Total number of shots;0005;;�
�
�Units velocity;fps;;
�
�Units distances;yd;;�
�Units kinetic energy;ft-lbf;;
�
�Units weight;grain (gr);;�
�
�Stats - Average;1087.83;fps;�
�Stats - Highest;1122.30;fps;
�
�Stats - Lowest;1067.52;fps;
�
�Stats - Ext. Spread;54.78;fps;�
�Stats - Std. Dev;21.01;fps;�
�
Shot ID;V0;V10;V25;V50;V75;V100;Ke0;Ke10;Ke25;Ke50;Ke75;Ke100;PF10;Proj. Weight;Date;Time
0001;1081;1066;1043;1007;0;0;103;100;96;90;0;0;42.64;40.00;04-19-2015;12:05:08;
0002;1122;1105;1080;1047;0;0;111;108;103;97;0;0;44.20;40.00;04-19-2015;12:05:33;
0003;1077;1063;1042;1008;0;0;103;100;96;90;0;0;42.52;40.00;04-19-2015;12:06:41;
0004;1068;1054;1033;996;0;0;101;98;94;88;0;0;42.16;40.00;04-19-2015;12:06:50;
0005;1091;1075;1052;1017;989;0;105;102;98;91;86;0;43.00;40.00;04-19-2015;12:07:04;
Also in that folder is another folder TRK which has a file for each individual shot (i.e. Shot0001 Track.csv):
sep=;
Device ID;LBR-0000048;;
Series No;0001
Shot No;0001
Time (s);Vel (fps);Dist (yd);SNR
0.000000;1081.10;0.00;-
0.019021;1069.75;6.79;32.18
0.021021;1070.32;7.50;31.28
0.023021;1068.25;8.22;41.61
0.025021;1067.04;8.93;40.20
0.027021;1066.37;9.64;38.84
0.029021;1065.15;10.35;38.22
...
0.429021;995.65;142.70;9.58
0.439021;992.90;146.01;12.27
0.447021;984.97;148.65;10.45
0.455021;1011.60;151.31;10.37
So as you can see there are a lot more data points than what the LabRadar display shows. In the example above I deleted most of the data to save space, but it will take a more detailed analysis to see how it's gathering data and doing calculations, and what data it considers valid.
So there it is- our first look at the LabRadar Ballistic Velocity Doppler Radar.
It is an easy to use device that will be used in much more of our testing going forward, both on the system itself, as well as every other ammo test that we conduct.
We'll have more info in the future, and want to provide a place for any questions and discussions so I'm creating a thread here. Feel free to post and ask away...
|
Speed Limit Science
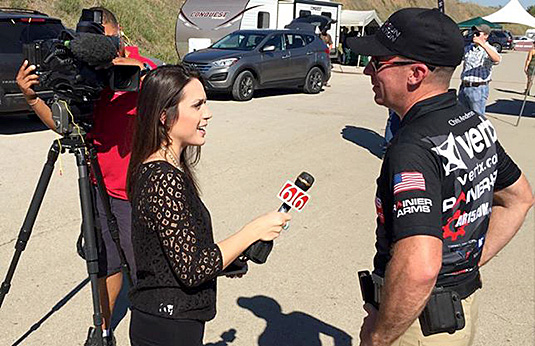
By: Chris Andersen, 3-Gun Nation Pro Shooter
On your daily commute you likely pass dozens of road signs telling you what the maximum safe speed is on that particular stretch of road is. Traffic engineers spent countless hours determining the appropriate speed for that road in an effort to keep you out of trouble.
In 3-Gun, a course of fire leaves you completely to your own devices, giving you every opportunity to go way too fast, or in some cases too slow, and come off track or not perform to your potential.
Imagine driving on a race track, where the only speed limit is the one you set, and the objective is to get around the track as quickly as possible. You set your own speed limits for a particular type of turn based on your own and capabilities and those of your car. The fastest way around the track means not leaving anything on the table, pushing as hard as you can without overdriving your car.
The same rules apply to your shooting. You determine how hard to push from 0-100% each time you address sections of a course of fire. After you master your shooting fundamentals, the science of determining, and then maximizing your personal speed limit is where real speed in action-shooting comes from.
My Approach
3-Gun scoring in most major matches can be a real grey area for determining appropriate speeds. Any two hits on a target or one center hit to neutralize it can mean different things to different people. A lot of shooters will spray bullets at targets in these matches, accepting the fact that they may or may not neutralize the targets with 2 bad hits, or hoping to get lucky with one hit in the center of the target. This can be a recipe for disaster.
My background is in action pistol, where center-hits help your score and I try to default to that mindset for 3-gun, shooting for center-hits just like I would at a pistol match. That means less makeup shots, a lower likelihood of a miss, and that consistency generally keeps me out of trouble. I even shoot pistol matches occasionally for practice, choosing divisions where getting points are most important to ensure I keep my accuracy in check.
That approach works as a great baseline, keeping penalties and makeup shots to a minimum. That also helps me not take long-distance shots for granted. Maxing out your speed from there comes from knowing EXACTLY how much time to spend or how hard to push to get those types of hits with as little waste as possible.
Before you start setting your criteria for what your speed limits should be, make sure that you have a couple of variables dialed in: equipment, ammunition and accuracy.
- Equipment - None if this works if you don’t know your guns. Trust in your gear is paramount to making the right decisions relative to speed. You would never take a trip if you knew your car was unsafe or may not make it. Apply that same type of logic to your gear. If you have never tested your rifle out to long distances for example, you are handicapping yourself when it comes to match performance. Time spent verifying this type of info can also be some of the best training time you will ever spend. So start there.
- Ammunition - I do as much as I can to squeeze maximum accuracy out of my guns when reloading and choosing equipment. If, for instance, I know my rifle is incredibly accurate, that confidence carries over into my shooting performance. That accuracy also increases my margin for error on long distance shots.
- Accuracy - Be certain your equipment is as accurate and reliable as it can be within your budget and time constraints. Then know your equipment capabilities by heart. This will minimize uncertainty, and help you accurately determine how fast you can go.
Setting Target Speed Limits
Being efficient on the clock comes down managing priorities. Knowing exactly how much time to spend on a particular type of target will equate to quantum leaps in speed in competitive shooting.
Think of driving on that racetrack again. You drive at different speeds depending on the type of road you are on, keeping your speedometer in check. Apply that same logic to the type of target you are addressing. I break target priorities into the following three categories, which can apply to all 3 guns in your kit.
- Easy - Think long, straight stretches of road, where the speed limit is high. These are close-range no-brainer targets that may not even require you to have a sight picture. Targets like this get the minimum amount of attention in my walk through, and likely only require a minimal sight picture to get the necessary hits on target, or possibly no sight picture at all (point shooting). You lose speed on targets like these when you spend too much time on them. Beginning shooters in particular tend to wait for that perfect sight alignment and make a good trigger press when none of that is necessary at all to neutralize these targets and move on. You may not even notice a transition happening between targets when you watch a high-level shooter in this situation because their cadence is so quick.
- Intermediate - Think of driving a twisty section of that track, where you can go fairly fast, but you have to mind your surroundings. I map these targets in my walk through and can see them in my mind before I shoot a stage. I make sure I have my positions planned to ensure I can engage them efficiently and take a good sight picture and aim for the center of the target. Never take these targets for granted, as the misses will surely sneak up with you. I pretend the outer scoring zone on these targets does not exist and shoot for the smaller target area created by doing this. That generally gives me just the right balance of speed, and enough accuracy to stay out of trouble.
- Difficult - Picture a treacherous canyon road where one misstep can mean big trouble. SLOW DOWN! These are danger targets. These targets can lose matches or cost you good finishes so it is important to recognize them. Speed is lost on danger targets when you don’t give them enough time or respect. Make-up shots, especially on long range, can cost enormous amounts of time. It is not unusual for a shooter to look back and realize that not giving enough respect to one or two targets in a match made a significant difference in how he or she finished. These targets get hard focus, perfect sight pictures and smooth, fundamentally sound trigger presses. Depending on your trust in your equipment and ability level, you might also be waiting to see the target fall or react to confirm the hit.
The key to speed on each target type is to first learn how to identify which one you are dealing with, and then to spend time on the practice range dialing in the speed limit for each difficulty level. That range time is critical for determining which sight pictures, shooting positions and shooting speed is appropriate for you in a given situation.
Practice Time
Try setting up all three types of targets next time you are at the range, and work on transitioning between them, adjusting your speed to give each one the level of respect that they deserve. Then push harder and test your perceptions. You may surprise yourself and find you are going too slow and spending too much time on certain targets. Then try slowing down. If your hits suddenly get better on difficult targets, that can indicate that you have been going too fast. Set up sample courses of fire and test both approaches on the clock to find which is most effective. That is your shooting speed limit.
You can also apply these principals to your movement into shooting positions, shooting on the move, and gun transitions and manipulation. Push hard, but never harder than you can control.
As you progress, your speed will increase, but your limits should not. They are always a percentage of your ability. Never lose sight of that. Too often people get caught up obsessing over numbers on a timer. Be careful as this can cause you to forget your fundamentals, and limit your improvement.
Testing and pushing these limits in your training help you improve, and slowing down and comparing approaches on the clock will keep you as efficient as possible. Proper management of personal speed limits will insure you achieve the best possible performance level and that means better match finishes!
|
|

First, I would like to thank each and every ARFCOMMER for their support of me and the NRA throughout the recently concluded NRA board of directors election. I look forward to serving all of you for another three-year term.
Please welcome fellow ARFCOMMERS Tim Knight and Sean Maloney to the board as well.
As always, should you need my assistance, please feel free to IM on the site and I'll do my best to help.
Yours in freedom, Joseph P. DeBergalis, Jr.
M855 Plot Thickens: Congressman Proposes Center-Fire Ammo Ban
You didn’t need a crystal ball to see this one coming. On Monday, a week after the BATFE withdrew its plan to ban M855 as "armor-piercing ammunition,” U.S. Rep. Steve Israel (D-N.Y.) announced that he intends to introduce legislation to “extend the definition of armor-piercing ammunition to include all bullets that can pierce body armor and be used in handguns."
The reason you didn’t need a crystal ball is that gun control supporters have been pushing this idea for years. In the 1980s, after NBC-TV did an attack piece on bullets invented for law enforcement officers to shoot through walls and doors, disingenuously calling them “Cop Killer Bullets,” gun control supporters seized upon the term and proposed legislation to ban any bullet that could penetrate a soft protective vest.
read article
Second Amendment Enforcement Act of 2015 Introduced
Last week, U.S. Senator Marco Rubio (R-Fla.) and U.S. Representative Jim Jordan (R-Ohio) introduced “The Second Amendment Enforcement Act of 2015” in the U.S. Senate and House respectively. These bills would restore the fundamental individual right for law-abiding D.C. residents to Keep and Bear Arms to defend themselves in accordance with the law. This bill would also conform D.C. law to federal laws in regards to governing firearms commerce, while also allowing D.C. residents to purchase firearms from licensed dealers in VA and MD, without the current hassle of D.C.’s onerous firearm registration system. The D.C. permitting system would also become streamlined, allowing for more law-abiding D.C. residents to legally obtain a permit and carry concealed firearms for self-defense.
read article
NRA Opposes Confirmation of Obama's U.S. Attorney General Nominee, Loretta Lynch
Senate Majority Leader Mitch McConnell (R-Ky.) said he plans to take the confirmation vote on President Obama’s U.S. Attorney General Nominee, Loretta Lynch, to the Senate floor sometime next week. The vote will likely be very close.
As the Nations’ top law enforcement officer, Lynch would almost certainly have an impact on our Second Amendment rights. We know Lynch supports the Obama administration’s position to ban “assault weapons.” And, we know that the general-purpose rifles that gun control supporters call “assault weapons”--such as the AR-15--are the most popular rifles in the United States. We also know that the President’s previous choice for Attorney General--Eric Holder--clearly demonstrated the damage an Obama-appointed, agenda-driven, anti-gun Attorney General can do to our rights and freedoms as Americans.
NRA opposes the confirmation of Obama nominee Loretta Lynch for Attorney General of the United States.
read article
|
|
newsletter advertising
|
|

ATPIAL-C
This month we're announcing the winner of the L3/Insight Technologies ATPIAL-C laser courtesy of TNVC.
And the lucky winner is: glazer1972
Contact sales to claim your prize...
Wether you won or not, go read about it and find out why you need one.
ULTRA HOG-CRUSHER
Not taking a break from a great giveaway, TNVC is raising the bar this month.
If you had to pay in to the IRS this year and are down on your luck, here is your chance to totally redeem yourself, and it will cost you nothing.
AR15.com site sponsors TNVC and BRAVO COMPANY are giving away the ultimate Hog Crusher Hunting Package.
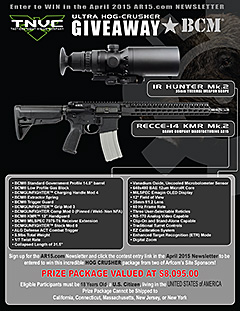
click image to view larger
You could win an IR Defense IR HUNTER Mk.2 35mm Thermal Scope and a BCM RECCE-14 KMR Mk.2.
That’s a prize package valued over $8,000.00!
Click here and you'll automatically be entered (no need to post in the thread).
Winner will be announced in next month's newsletter.
GOOD LUCK TO ALL!
|
|
|
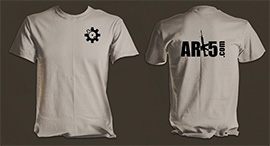
After nearly 2 years of being off line, our shirts are once again available.
A number of designs are available, including the "Build Your Own" shirt tool that lets you select and preview your shirt designs.
Also new this year are the performance T's, Polo, and Q-Zip shirts.
All Shirts |
BYO T : $17.00 |
BYO LS : $20.00
|
|
|
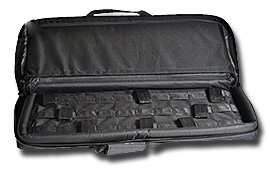
Takedown Cases
BACK IN STOCK!
We are back to shipping again after the initial supply sold out.
Heavy-duty padded cases are a mere 26x12x4" so they fit easily in your vehicle, stack easily, and offer generous protection from the elements and physical abuse.
At the same time they are easily configurable for your needs, and have room for your primary weapon along with a variety of accessories you may choose to carry with it.
Designed to hold a full 16" barreled upper with optics, lower, magazines, sling and cleaning kit it holds everything you'll need.
Takedown Bags : $60.00
|
|
|

Use Your Illusion
We talk a lot about the advantages of night vision in the field. But, we would be remiss if we didn't talk about some things to watch for. Night Vision can create illusions that the savvy operator and/or hunter needs to be aware of.
We all know that night vision image tubes are monochromatic. While they provide us with excellently bright images at night, they can also play tricks on us.
This is especially true in darker areas such as under heavy tree canopy/foliage, in caves, and basements. Often times it can be difficult to tell the difference between shadows and holes or depressions in the terrain.
The reason is because of the high contrast created by a night vision image. The lack of other visible colors also hampers the user's ability to reconcile images. So, you have to be very careful and move slowly under these conditions.
Stepping into a hole or depression in the ground when you thought it was simply a shadow can at best, cause an injury. At worst, it can give away your team's position to enemy personnel.
For more information on all things night vision related, please make sure to visit the TNVC Industry Forum.
|
|
|
AR-15 Review: Get Tactical in 2015

Don't Believe the gloom and doom about the slowing AR market. There has never been a better time to be shopping for your first or 12th modern sporting rifle.
Glock MOS Review
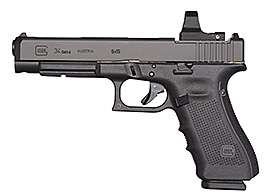
The Modular Optics System changes the game for this popular firearms maker.
.338 Lapua Mag: The Ultimate Long-Range Round?
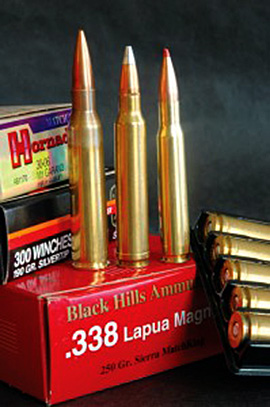
The .338 Lapua Mag. dates to 1983, when Research Armament Industries, in the U.S., outlined plans for a sniper cartridge driving a 250-grain .338 bullet at 3,000 fps.
|
|
|

Urban Escape and Evasion
OnPoint Tactical, premier provider of scout, tracker and wilderness survival skills, was here in Dallas last month for their Urban Escape and Evasion Course and we were there to bring you a review of the course.
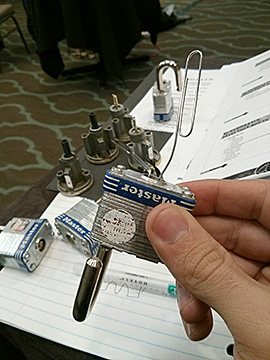
The 3 day course consisted of 2 days of instruction and exercises on multiple topics, and ended with a field exercise on day three. The FTX started off with a sitrep as follows:
Things in Dallbekistan have gone bad. A coup occurred, led by rebels. The US Embassy has been evacuated. Americans are being rounded up and imprisoned. You have been detained by local militiamen and will soon be put into a vehicle for transport.
The militia is rounding up more of your countrymen. You must escape and work your way towards the Downtown area. The militia knows who you are and have many agents in the field who would be none to happy to separate your head from your body with a dull knife.
Once you escape, you should immediately arm yourself with an improvised weapon. You will receive further instructions as you proceed.
And so began a very long day for us...
For more check out the thread and for future locations and dates see their web site at www.onpointtactical.com.
|
   
|
|
DeLauro Introduces "AR-15 Upgrade Act of 2015"
Been thinking about retiring your old AR-15A1 and buying a suppressed, short-barreled AR for home protection? Need a new AR, because you’ve worn one out, shooting in Three-Gun matches? Been thinking about improving your AR with a mil-spec barrel and bolt carrier assembly, a “flat top” upper with a red dot sight, a low-profile handguard, and a more effective flash hider?
If so, Rep. Rosa DeLauro (D-Conn.) has a plan that can help you.
You Can't Get There from Here: Obama Administration Shrugs Off Woes of International Travelers
For weeks, we have been reporting on how a long-dormant State Department rule change is suddenly being enforced to the detriment of Americans trying to travel lawfully overseas with firearms.
Caught in the Act: Anti-Gunners' Trick Photo Exposed
If a picture is worth a thousand words, you should be skeptical about what this picture from "Moms Demand Action" has to say.
Reality of NRA Convention Defies Anti-Gun Media Stereotype
To say that the agenda-driven media often attempts to portray NRA and gun owners in a negative light is an understatement. Some ignorant writers and political commentators try to label NRA as extremists; or worse. Others claim that gun owners exercising their right to carry will resurrect the "Old West" and that laws recognizing this right "seem almost designed to encourage violence."
Brady Center's Attorneys Withdraw from Case Under Cloud of Ethical Lapses
Earlier this week, the Brady Center's Legal Action Project attorneys Jonathan Lowy and Alla Lefkowitz withdrew from a Wisconsin lawsuit after inadmissible evidence was published on Brady’s website in violation of Wisconsin’s rules of professional conduct concerning trial publicity.
|



|

